Create a restful application with AnguarJS and CakePHP(III): Build the frontend pages with AngularJS
Build the frontend pages with AngularJS
AngularJS is one of the most popular JS frameworks, with which it is easy to build awesome single page applications.
If you have no experience of AngularJS framework before, you could have to read the official AngularJS tutorial firstly and get the basic concept of AngularJS.
Prepare AngularJS resources
In this project, I do not want to make thing complex, so the AngularJS resources will be put in the same application. In further posts, I could move the AngularJS frontend resource into a standalone NodeJS application.
You can download a copy of AngularJS seed from AngularJS Github, extract files into your local disc, and copy the app folder into webrootfolder of this project as the start point of the next steps.
The app folder should look like.
webroot
 /app
  /js
   app.js
   controllers.js
   directives.js
   filters.js
   services.js

  /img
  /css
  /lib
   /angular
   /bootstrap
   jquery.js
  /partials
  index.html
I place jquery, angular and bootstrap into the lib folder.
index.html
index.html is the template container of all pages.
<!doctype html>
<html lang="en" ng-app="myApp">
    <head>
        <meta charset="utf-8">
        <title>AngularJS CakePHP Sample APP</title>
        <link href="lib/bootstrap/css/bootstrap.min.css" rel="stylesheet" media="screen">
        <link rel="stylesheet" href="css/app.css"/>
    </head>
    <body ng-controller="AppCtrl">
        <div class="navbar navbar-fixed">
            <div class="navbar-inner">
                <a class="brand" href="#">
                    <msg key="title"></msg>
                </a>
                <ul class="nav">
                    <li ng-class="activeWhen(path() == '/posts')">
                        <a href="#/posts">Posts</a>
                    </li>
                    <li ng-class="activeWhen(path() == '/new-post')">
                        <a href="#/new-post">New Post</a>
                    </li>
                </ul>
            </div>
        </div>

        <div class="container">
            <div ng-class="'alert alert-' + message().type" ng-show="message().show">
                <button type="button" class="close" ng-click="message().show = false">×</button>
                <msg key-expr="message().text"></msg>
            </div>
            <ng-view></ng-view>
            <div class="footer">Angular seed app: v<span app-version></span></div>
        </div>


        <!-- In production use:
        <script src="//ajax.googleapis.com/ajax/libs/angularjs/1.0.7/angular.min.js"></script>
        -->
        <script type="text/javascript" src="lib/jquery.js"></script>
        <script type="text/javascript" src="lib/jquery.i18n.properties-min-1.0.9.js"></script>
        <script type="text/javascript" src="lib/html5shiv.js"></script>
        <script type="text/javascript" src="lib/holder.js"></script>
        <script type="text/javascript" src="lib/bootstrap/js/bootstrap.min.js"></script>

        <script type="text/javascript" src="lib/angular/angular.js"></script>
        <script type="text/javascript" src="js/app.js"></script>
        <script type="text/javascript" src="js/services.js"></script>
        <script type="text/javascript" src="js/controllers.js"></script>
        <script type="text/javascript" src="js/filters.js"></script>
        <script type="text/javascript" src="js/directives.js"></script>

    </body>
</html>
In the html element, there is a ng-app attribute, which indicates this is an AngularJs application. In the js/app.js file, define a AngularJS module named myAPP, it includes submodules myApp.filters,myApp.directive, myApp.controllers, they are deifned in filters.js, directives.js, controllers.js files respectively.
as = angular.module('myApp', ['myApp.filters', 'myApp.services', 'myApp.directives', 'myApp.controllers']);
The index.html will work as a template, there is a ng-view element, which is a AngularJS specific directive, it will render the routing page content at runtime.
Routing
In the js/app.js, define the path routing of Post list, add, edit page.
as.config(function($routeProvider, $httpProvider) {
$routeProvider
 .when('/posts', {templateUrl: 'partials/posts.html', controller: 'PostListCtrl'})
 .when('/new-post', {templateUrl: 'partials/new-post.html', controller: 'NewPostCtrl'})
 .when('/edit-post/:id', {templateUrl: 'partials/edit-post.html', controller: 'EditPostCtrl'})
 .otherwise({redirectTo: '/'});

});
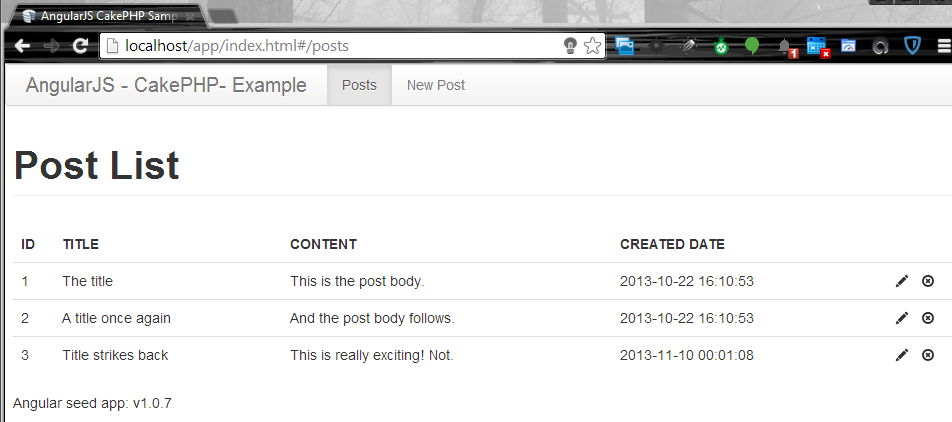
Post List
Let's create the posts.html and PostListCtrl.
<div ng-controller="PostListCtrl">
    <h1 class="page-header">Post List</h1>
    <table class="table">
        <thead>
            <tr>
                <th width="25px">ID</th>
                <th>TITLE</th>
                <th>CONTENT</th>
                <th>CREATED DATE</th>
                <th width="50px"></th>
            </tr>
        </thead>
        <tbody>
            <tr ng-repeat="e in posts">
                <td>{{e.Post.id}}</td>
                <td>{{e.Post.title}}</td>
                <td>{{e.Post.body}}</td>
                <td>{{e.Post.created|date:'short'}}</td>
                <td><a ng-click="editPost($index)"><i
                            class="icon-pencil"></i>
                    </a>

                    <a ng-click="delPost($index)"><i
                            class="icon-remove-circle"></i></a></td>
            </tr>
        </tbody>
    </table>


</div>
In the posts.html, use a ng-repeat directive to interate the posts in a table.
Define a PostListCtrl in js/controllers.js.
as.controller('PostListCtrl', function($scope, $rootScope, $http, $location) {
        var load = function() {
            console.log('call load()...');
            $http.get($rootScope.appUrl + '/posts.json')
                    .success(function(data, status, headers, config) {
                        $scope.posts = data.posts;
                        angular.copy($scope.posts, $scope.copy);
                    });
        }

        load();

        $scope.addPost = function() {
            console.log('call addPost');
            $location.path("/new-post");
        }

        $scope.editPost = function(index) {
            console.log('call editPost');
            $location.path('/edit-post/' + $scope.posts[index].Post.id);
        }

        $scope.delPost = function(index) {
            console.log('call delPost');
            var todel = $scope.posts[index];
            $http
                    .delete($rootScope.appUrl + '/posts/' + todel.Post.id + '.json')
                    .success(function(data, status, headers, config) {
                        load();
                    }).error(function(data, status, headers, config) {
            });
        }

});
PostListCtrl will load the posts from REST API by default. In the scope of PostListCtrl, there are some other actions defined,addPost and editPost are use to navigate to a new add or edit page, and delPost will the selected Post immediately, and refresh the list after it is deleted successfully.
More info about scope and $http, please consult the online AngularJS document.
In browser, navigate to http://localhost/app/index.html and click Post List link, you should see the screen like this.
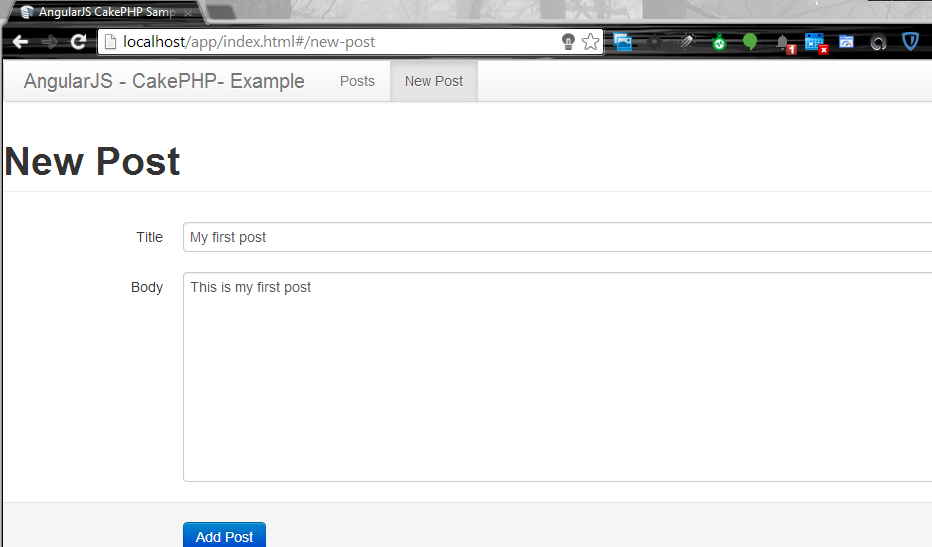
Add a new Post
According to the routing definition, we need to create a new-post.html page and a controller
NewPostCtrl.
The new-post.html template.
<div ng-controller="NewPostCtrl">
    <form  class="form-horizontal">
    <h1 class="page-header">New Post</h1>
    <fieldset>
        <div class="control-group">
            <label class="control-label" for="title">Title</label>
            <div class="controls">
                <input id="title" type="text" class="input-block-level"
                       required="true" ng-model="post.title"></input>
            </div>
        </div>
        <div class="control-group">
            <label class="control-label" for="body">Body</label>
            <div class="controls">
                <textarea id="body" class="input-block-level" rows="10"
                          ng-model="post.body" required="true"></textarea>
            </div>
        </div>
    </fieldset>
    <div class="form-actions">
        <button class="btn btn-primary" ng-click="savePost()">Add Post</button>
    </div>
    </form>
</div>
The
NewPostCtrl controller.as.controller('NewPostCtrl', function($scope, $rootScope, $http, $location) {
$scope.post = {};
$scope.savePost = function() {
console.log('call savePost');
var _data = {};
_data.Post = $scope.post;
$http
.post($rootScope.appUrl + '/posts.json', _data)
.success(function(data, status, headers, config) {
$location.path('/posts');
}).error(function(data, status, headers, config) {
});
}
});
Add a button in the posts.html.
<p>
<button type="button" class="btn btn-success"
 ng-click="addPost()">
    <b class="icon-plus-sign"></b>Add Post
</button>
</p>
Refresh your brower have a try now.
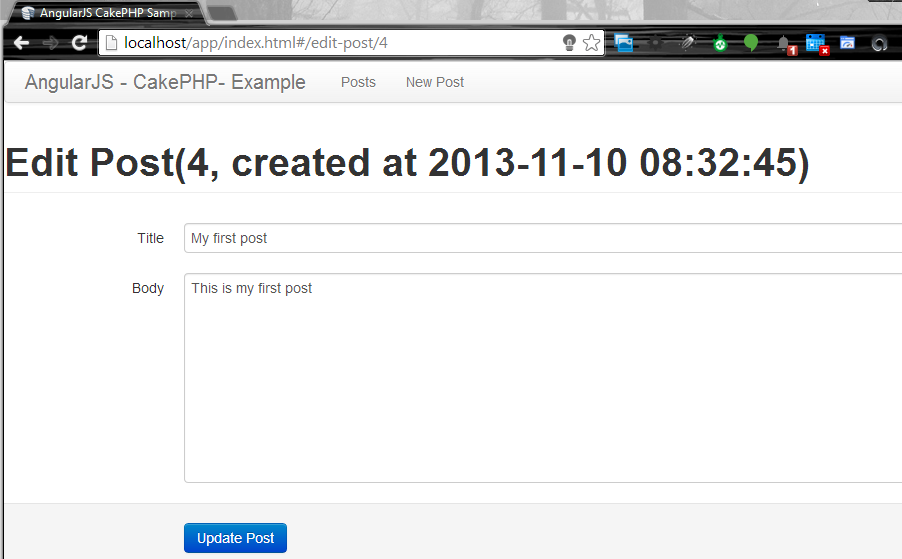
Edit Post
The template page and controller is similar with the add action, the difference is we must load the edit data from REST API before open the edit page.
The edit-post.html template.
<div ng-controller="EditPostCtrl">
    <form class="form-horizontal">
        <h1 class="page-header">Edit Post({{post.id}}, created at {{post.created|date:'short'}})</h1>
        <fieldset>
            <div class="control-group">
                <label class="control-label" for="title">Title</label>
                <div class="controls">
                    <input id="title" type="text" class="input-block-level"
                           required="true" ng-model="post.title"></input>
                </div>
            </div>
            <div class="control-group">
                <label class="control-label" for="body">Body</label>
                <div class="controls">
                    <textarea id="body" class="input-block-level" rows="10"
                              ng-model="post.body" required="true"></textarea>
                </div>
            </div>
        </fieldset>
        <div class="form-actions">
            <button ng-click="updatePost()" class="btn btn-primary">Update Post</button>
        </div>
    </form>
</div>
The
EditPostCtrl controller.as.controller('EditPostCtrl', function($scope, $rootScope, $http, $routeParams, $location) {
var load = function() {
console.log('call load()...');
$http.get($rootScope.appUrl + '/posts/' + $routeParams['id'] + '.json')
.success(function(data, status, headers, config) {
$scope.post = data.post.Post;
angular.copy($scope.post, $scope.copy);
});
}
load();
$scope.post = {};
$scope.updatePost = function() {
console.log('call updatePost');
var _data = {};
_data.Post = $scope.post;
$http
.put($rootScope.appUrl + '/posts/' + $scope.post.id + '.json', _data)
.success(function(data, status, headers, config) {
$location.path('/posts');
}).error(function(data, status, headers, config) {
});
}
});
Try edit the new added post and save it.
Summary
The basic CRUD implementation in AngularJS is simple and stupid, and all data communicated with the backend is via REST/JSON which we have done in the last post.
评论